Some of your interactions might contain lists, and you may wish to display the elements of the list visually to make it more readable.
This can be done using list markers. The list markers available in TAO are either symbols (e.g. bullets), letters or numbers. They are easy to insert: just click on List Style in the properties panel of your interaction and select a style from the drop-down menu.
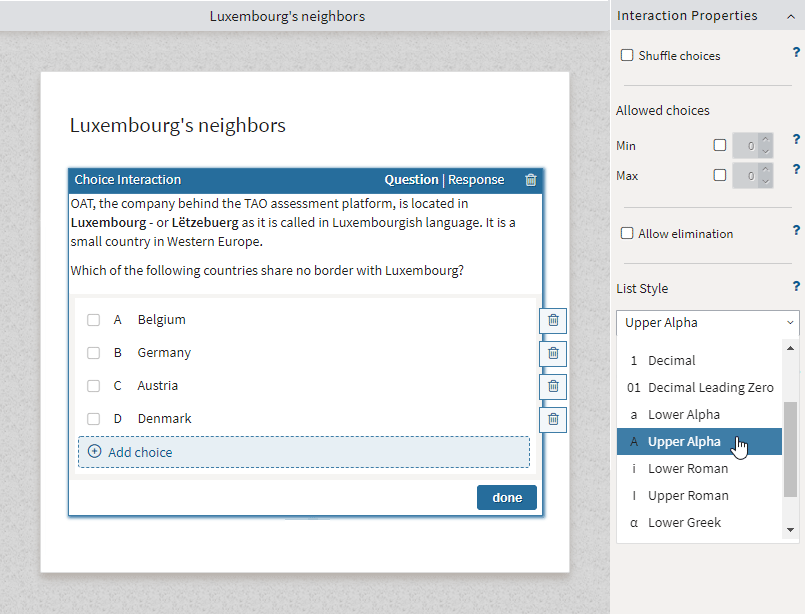
List markers
There are a few things that you need to consider when using list markers:
- List markers aren't part of the QTI standard. As a consequence, if you author items with list markers in TAO and then run the test on a platform other than TAO, the test will still function but the markers may not be shown.
- Screen readers don't see the markers. In the above example, a screen reader would read "Belgium, Germany" etc. and omit the markers. If you need them to be read out, you will need to include them as part of the labels, e.g. "A Belgium, B Germany", etc.
- Markers aren't subject to shuffling. When using Shuffle Choices for your interaction, markers inserted in TAO will always appear in the correct order: they aren't influenced by the shuffling process. Markers which are included as part of the label (as described above), however, will be shuffled along with the choices, and if the markers are numerical or alphabetical, they might therefore appear in the wrong order.
- Markers start at 1, A, a by default. Sometimes our customers ask if it's possible to start markers at a different point in the alphabet - for example D. Usually, this is relevant in scenarios where a series of interactions spans multiple items. TAO has no built-in mechanism for this, but you can implement it using a custom stylesheet.
Now let's fill in a sample stylesheet (a.k.a. CSS file) to illustrate how this works. We will stick to D as a starting point. This is going to be a bit technical, but don't worry - we'll keep it very light. The only thing you really need to know is a single number.
As you can see in the table below, this number is simply the position of the letter in the alphabet. However, the position is based on 0 and not on 1, as you may expect.
|
to start with |
A |
B |
C |
D |
E |
F |
G |
H |
I |
J |
K |
L |
M |
N |
O |
P |
Q |
R |
S |
T |
U |
V |
W |
X |
Y |
Z |
|
to start with |
1 |
2 |
3 |
4 |
5 |
6 |
7 |
8 |
9 |
10 |
11 |
12 |
13 |
14 |
15 |
16 |
17 |
18 |
19 |
20 |
21 |
22 |
23 |
24 |
25 |
26 |
|
set counter to |
0 |
1 |
2 |
3 |
4 |
5 |
6 |
7 |
8 |
9 |
10 |
11 |
12 |
13 |
14 |
15 |
16 |
17 |
18 |
19 |
20 |
21 |
22 |
23 |
24 |
25 |
So if you want to start on D, the number you are looking for is 3.
- Download the sample file marker-reset.css, which contains the examples below along with explanations.
- Open the file in a text editor. Do not use a word processor such as MS Word; Windows NotePad or Mac TextEdit will do just fine.
Let's have a look at the source code:
/* 1. One single interaction per item */
html body div.qti-item [class^=list-style-],
html body div.qti-item [class*=" list-style-"] {
counter-reset: custom-counter 0;
}
/* 2. Multiple interactions per item, all in subsequent rows */
html body div.qti-item .grid-row:nth-of-type(1) [class^=list-style-],
html body div.qti-item .grid-row:nth-of-type(1) [class*=" list-style-"] {
counter-reset: custom-counter 0;
}
/* 3. Multiple interactions per item, all in the same row */
html body div.qti-item div:nth-of-type(1) [class^=list-style-],
html body div.qti-item div:nth-of-type(1) [class*=" list-style-"] {
counter-reset: custom-counter 0;
} - Change the 0 behind custom-counter to the digit that corresponds to your starting letter from the table or digit above. In our example, this line would then read
counter-reset: custom-counter 3; - If you are using scenario 2 or 3, you also need to change the value of :nth-of-type, but this time counting starts at 1 for the first interaction etc.
- Save the file on your hard drive. If you plan on working with multiple reset files, the file name should reflect what you are doing with it, e.g. msr2-c3-marker-reset.css could mean Multiple in single row, starting at 2, counter starts at 3. This way you have a variety of files at hand when you need them.
- Open your item in the authoring mode to apply the stylesheet.
- Click on the interaction.
- Click on Style Editor on the top right.
- Click on Add Style Sheet and upload your CSS file.
- Save the item.
Note: You have to pick just one of the scenarios - they will override each other otherwise. The first line in each scenario (beginning '/*') just tells you which cases that particular scenario deals with - it is not part of the code.
Note: If you want to take this further and struggle with :nth-of-type, which can be tricky at times, we recommend this article on CSS-Tricks for a good demonstration.

Adding a stylesheet
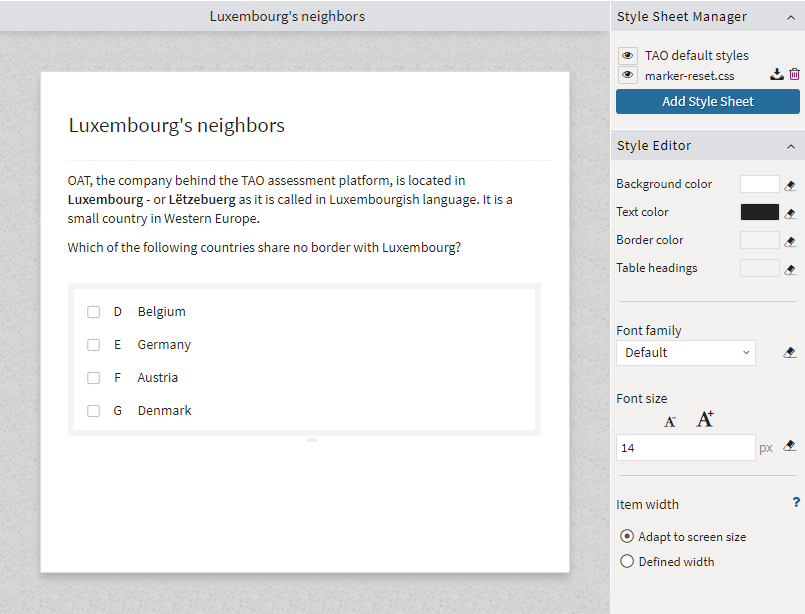
The resulting interaction
Note: We show you this method as a courtesy, but cannot offer technical support for it!