The following information will need to be configured for each of Ian’s interactions:
Allow the test-taker to select only one of the available choices
In the Interaction Properties panel (which appears on the right next to the interaction when dragging it onto the canvas), Ian selects the maximum number of choices (Max) in the Allowed choices boxes as “1”. This means that for each interaction, the test-taker can only choose one of the options as his/her answer.
Set up the scoring rules for the individual interactions
Next, Ian needs to define the basic scoring rules for the interactions in his item. He does this in the Response Properties of the interaction. Clicking on Response inside the interaction opens the Response Properties panel on the right, as shown in the image below.
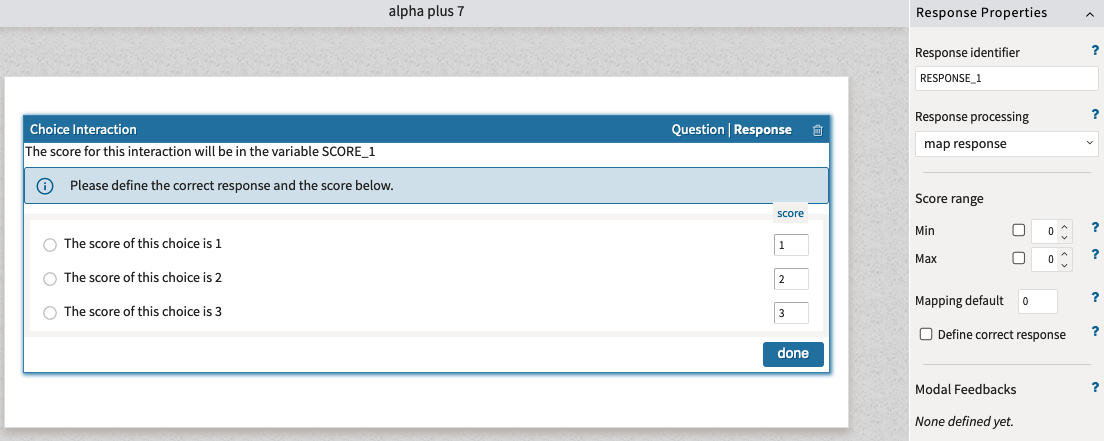
First, he changes the Response identifier to RESPONSE_1. This isn’t strictly necessary, but we recommend it as it serves as a way of identifying the test-taker’s response later. Using identifiers means that when Ian is looking at a particular test-taker’s results after the test, he can see directly that this response relates to the first interaction in his test item (he could also label it with something descriptive, for example ‘capital-angola’, if the test was about capital cities).
Next, in the Response processing box, Ian selects map response from the drop-down menu. This enables each potential response by the test-taker to yield a specific score.
When map response is selected, SCORE boxes will appear opposite each choice inside the interaction.
In each of the SCORE boxes, Ian enters the value associated with that choice, e.g. a value between 0 and 3 for each choice. You can see in the image that if the test-taker chooses the first option, they will get a score of 1, if they choose the second option, they will get a score of 2, and if they choose the third option, they will get a score of 3.
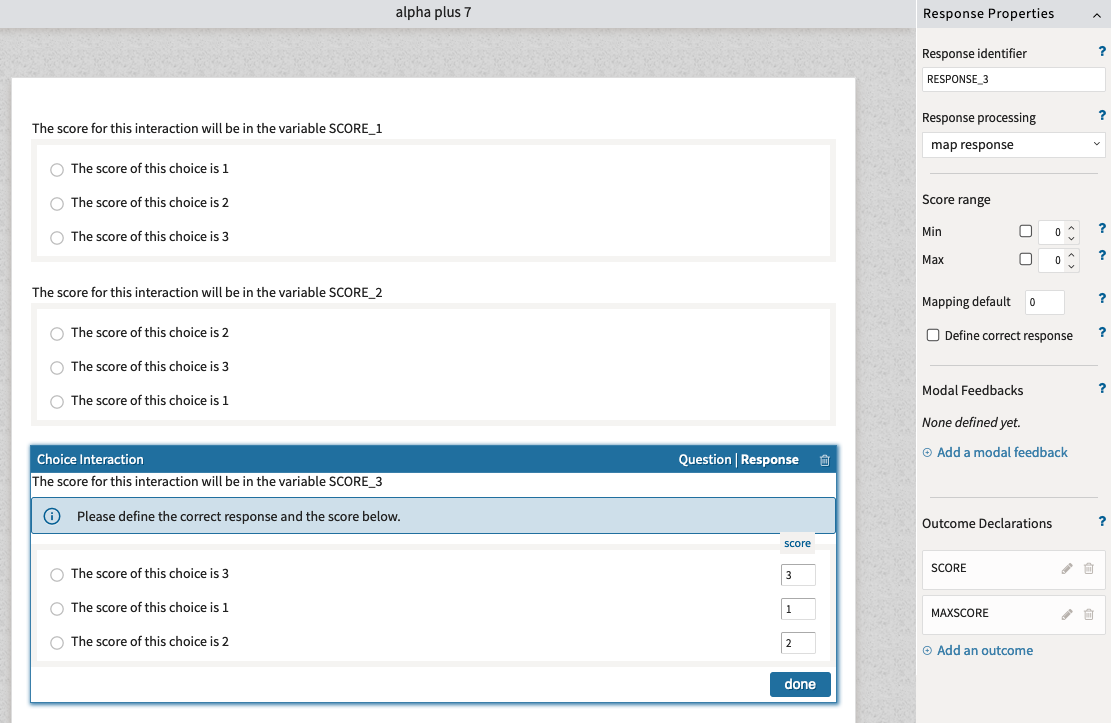
He repeats this process for as many Choice interactions as he needs. In our example, Ian has put three choice interactions in his item. For each one, he needs to rename the Response identifier with the relevant index. In our example, as shown below, this is:
- RESPONSE_2 for the second choice interaction
- RESPONSE_3 for the third choice interaction
A reminder: You can ignore for the moment the contents of both the prompts (e.g. ‘The score for this interaction will be in the variable SCORE_1’) and the choices (e.g. ‘The score of this choice is 3’) - these will be used later to make the scoring method more transparent.