To understand the steps which Ian needs to carry out next, we first need to know a bit about variables. Variables are memory spaces where information can be stored. The information which Ian needs to store at this stage is the information relating to the score the test-taker gets for each of the interactions in the item. It needs to be stored so that it can be accessed later in the scoring process.
As described in the lesson 'Configuring the interactions' in the last chapter, he clicks on Response in his first interaction to open the Response Properties panel. Under Outcome Declarations, he then clicks on Add an outcome. Creating different outcomes for the same item enables him to create a separate variable for each interaction in the item.
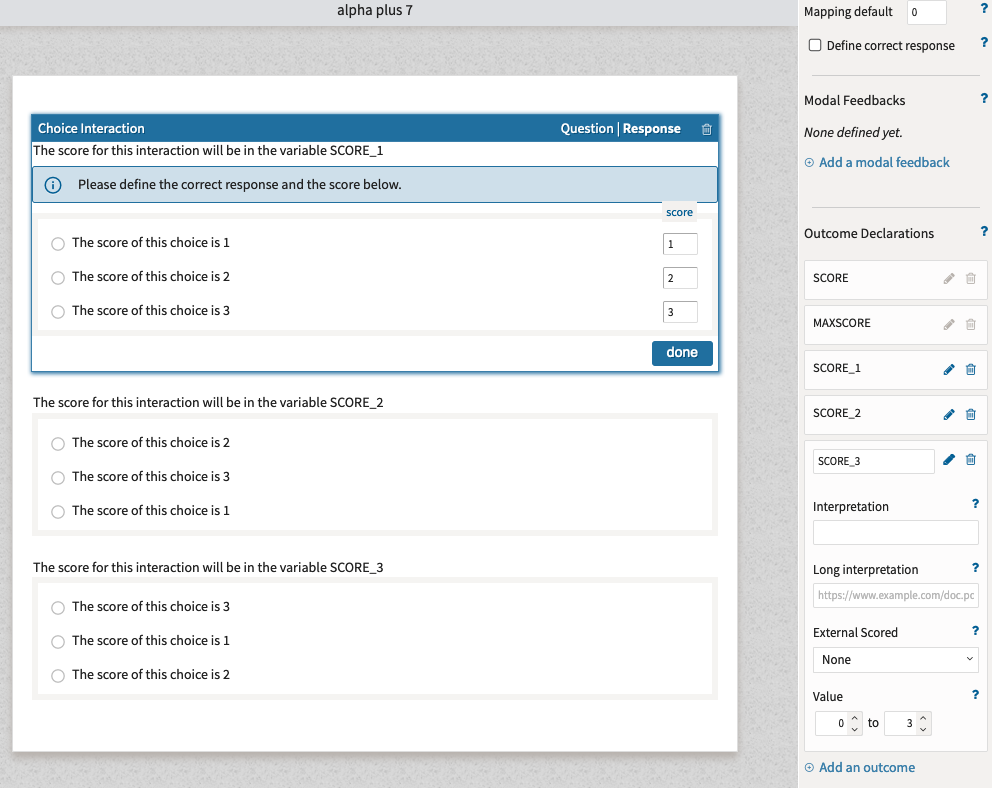
Note: You can access the variables for all of the interactions in an item via any one of the interactions in it - the Response Properties panel (where all properties, including these variables, are defined) which opens is the same one, regardless of which interaction you access it from.
Next, he clicks on the Pen icon to edit the newly created outcome. He needs to do the following:
- Change the Identifier to SCORE_1 (as this is the first interaction) by overwriting ‘OUTCOME_1’ in the box.
- Set the maximum Value to ‘3’ (3 is the highest possible score for this interaction: if scores of the responses were 1,2 and 5, he would need to put 5 here).
He repeats the process for each interaction. He creates variables called SCORE_2 and SCORE_3. Each of these three variables (SCORE_1, SCORE_2 and SCORE_3) will later be connected to one of the three interactions in his item.
The image below shows the added outcomes for all three interactions in the response properties panel. The third one is open.